This Mother’s Day, instead of giving Mum something she’ll rarely use, or serving cold toast with lukewarm tea, why not flex your DIY muscle and make something yourself?
Cricut recently commissioned a survey on homemade gifts, which found 55 per cent of Australians feel very special after receiving a handmade or personalised present.
Here’s a few ideas you can whip up in a relatively short amount of time, starting with Cricut’s word search wine bag.
What you’ll need: Some items you may have lying around the house (butcher’s paper and white card), together with a number of Cricut items you’ll need to invest in, and a blank wine bag.
While the initial outlay for this project might be more than your budgeted for Mother’s Day, it does mean you have the machine for a whole host of other DIY projects in the future – think Father’s Day, Christmas gifts for grandparents and teachers, etc.
Steps: Open the Cricut Design Space app on your phone or laptop. Click ‘projects’, use the dropdown menu to select ‘all categories’, then click on ‘word search wine bag’.
Your can alter the project by selecting ‘customise,’ then use the tools in the ‘edit’ panel to make changes before you begin.
- Read more: Check out how you can save with the latest deals on interiors, homewares and DIY products with discount codes from Australian Coupons.

I MADE THIS: Word search wine bag (top) and homemade bouquet. Photos: Supplied.
Meanwhile, flowers are a time-honoured Mother’s Day gift, and for good reason – not only beautiful, they have the ability to lift anyone’s home or mood in a heartbeat.
This year, instead of a traditional bouquet of flowers, why not make up a bouquet of seeds and bulbs of flowers she can then plant herself?
Throw it all in a ceramic pot, add some gardening gloves and offer up one of your weekends to help Mum plant her bouquet.
You can purchase everything you need at a local nursery, or even major retailers such as Big W.
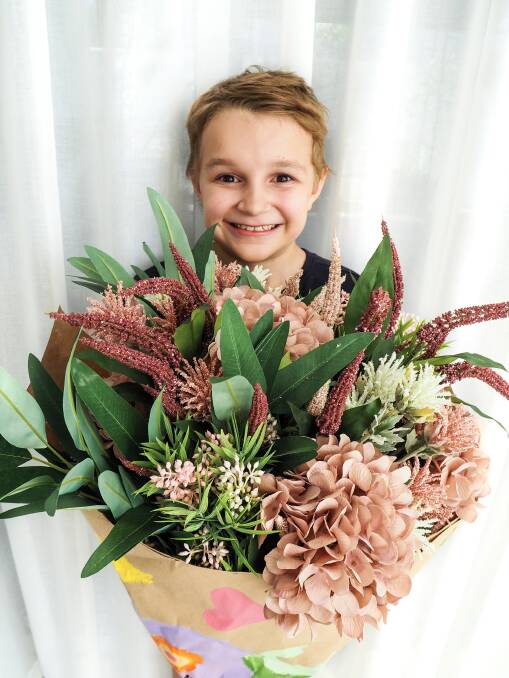
Alternatively, you could create a stunning, oversized bouquet using faux flowers and help your kids get creative with hand decorated wrapping paper.
DIY queen and interior stylist Hayley Little has worked her magic and created a step-by-step guide on how to create the perfect bunch of faux blooms.
What you’ll need: Faux flowers, brown paper, ribbon, scissors, string, paints and a large roll of brown paper. Hayley used 25 stems from Early Settler for this project. Choose a variety of sizes and textures, and also include a few pieces of greenery.
Steps: Start with a larger bloom and work your way around in a circle from the centre. Keep adding blooms until you are happy with the size of your bunch.
Trim your stems at the bottom so they all end at the same length. This looks cleaner and will sit evenly if you put your bouquet into a vase.
Once the kids have decorated a rectangle-size sheet of paper, turn the paper on an angle with one corner pointing up. Bring the opposite corner up to create two corners pointing up and fold firmly.
Place your bouquet between the two points, wrap each side around the flowers and tie with the string.
Finally, tie a long length of ribbon over the string and secure with a bow.
